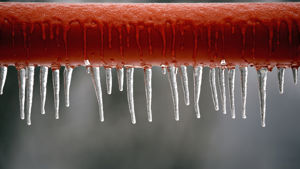
In the situation of a leaking radiator, it’s vital that you act quickly to avoid doing permanent damage to your flooring and electronics. Luckily, we’re going to show you how to fix a leaking radiator so that you can get back to enjoying your warm and happy home in no time!
Preparation for Fixing a Leaking Radiator
So, you’ve called your friend with the toolbox to come round and fix your leaking radiator but, what can you do to help while you wait? For starters, you’re going to want to catch the water to ensure that it can’t cause any further damage. Thankfully, you won’t need any fancy equipment to do this - a bucket and some towels should do the trick perfectly.
How to Identify Where it’s Leaking From
Since radiator leaks can come from a number of different places, you’ll need to determine where exactly the leak is coming from. You can do this by drying your radiator completely and then get some toilet roll that you’ll use to place over the radiator’s fixtures. Whichever part of the radiator drenches the toilet roll is the source of the radiator leak.
Leaking from the Radiator Body
If the radiator is leaking from the body, you might be wondering how to fix a leaking radiator in this situation. Unfortunately, since this type of leak is caused by corrosion, you’ll need to completely replace the radiator body. (Although, you could take this as a blessing that you finally have an excuse to buy that designer radiator you’ve had your eye on!)
To tide you over until you get your dream radiator, there’s also a temporary fix that you can take, though. If you have a feed and expansion tank, it’s possible to add a plastic resin sealant to stem the water flow. Take note, though, that this isn’t possible to do with a sealed central heating system.
Leaking Radiator Valve
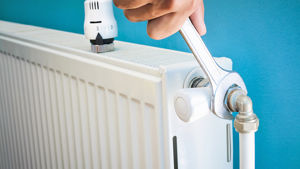
If you discover that you have a leaking radiator valve, luckily this is often an easy problem to fix.
Radiator valve problems are usually caused by damage to the internal spindle packing. This leak only occurs when the valve is partly open and stops when the valve is closed.
But how do you fix a leaking radiator valve? To repair the radiator leak by yourself, just follow these simple instructions. If you’re not so handy with a toolbox, it shouldn’t be expensive to call out a plumber to help you with this straight-forward problem.
How To Fix A Leaking Radiator Valve:
- Drain the leaking valve below the leak
- Turn off the supply & lock shield valve
- Catch the water that escapes
- Undo the union nut
- Open the bleed valve to release water
- Wrap the valve tip in PTFE tape
- Re-tighten the union nut & open the bleed & lockshield valves
- Allow your radiator to fill up again
- Check there are no leaks & close the bleed valve

Leaking from the Radiator Spindle
If you’ve identified that the leak is coming from the spindle and not the valve itself, then you can start counting your lucky stars! Much like the valve, this is a simple problem to repair.
To fix a leaking radiator valve spindle, simply use your spanner to tighten the gland nut. This should, hopefully, stop it however, if not, undo the gland nut, wrap some PFTE tape down into the spindle and then tighten it back up again.
If your radiator’s still leaky, you might need to revaluate why the radiator is leaking and follow our steps to check where the leak is coming from. Chances are you’ve confused a spindle leak with a radiator valve leak but, luckily, we’ve already shown you how to fix this.
Leaking from the Radiator Gland
Did you follow our instructions on how to fix a leaking radiator valve but the problem’s still persisting? The most likely cause for this is that your radiator’s leaking from the gland- not the valve. The radiator gland is a tiny fixture that lives underneath the plastic lid of the valve.
Here’s how to fix a leaky radiator gland easily using PFTE tape:
- Turn on the valve and wait to see if any water leaks from under the plastic cap. If it does, you should also turn off the lockshield valve.
- After removing the plastic cap, carefully unscrew the gland nut
- Take a 20 cm long piece of PFTE tape and wrap it around the valve spindle
- Use a flat-headed screw driver to force the tape into the body of the valve
- Screw the gland nut back on before replacing the plastic cap and turning the valve back on
Leaking from the Radiator Pipe Joint
If you have a compression heating system, you’ll have a series of joints that connect the pipes to your radiator. When these joints get lose, leaks can happen. To fix a leaking pipe joint, simply use your spanner to tighten the joints up. If your radiator is still leaking water after being repaired, follow these steps:
- Drain your radiator to below the source of the leak
- Use a spanner to remove the nut from the leaking radiator pipe
- Take your PFTE tape and wrap it around where the face of the olive meets the joint.
- Re-tighten the nut using your spanner
Leak Sealer
Leak sealer is a great product which can allow you to seal small, internal and inaccessible leaks as well as weeping joints. This is the perfect solution for problematic leaks and can be used on all materials found in heating systems, including aluminium.
Leak sealer will work best in warm circulated water and can be effective within 24 hours depending on the severity of the leak.
Do You Need to Replace Your Radiator or Valves?
Unfortunately, sometimes you’ll find that you need to completely replace your radiator, or at least the valve. This would be the case if your radiator leak is coming from the body or the valve is faulty.
If you’re faced with the task of replacing a damaged radiator or radiator valve, you’ll need to predetermine which product is right for you.
To replace your radiator valve, you should make sure that the new valve you purchase is the same as your existing valve before following these steps:
- Drain all of the water from your central heating system
- Use your spanner to unscrew the nuts that connect the water pipe to the valve and then completely unscrew the old valve
- Lightly clean the radiator valve threads
- Wind PFTE thread around your new adapter’s threads then carefully screw it into the radiator
- Finally, refill the central heating system and bleed the radiator to remove trapped air
To replace a leaking radiator, you should remember that bigger doesn’t necessarily mean better. With modern radiators, you can even half your current rod size for just as much heat output. Not only will this reduce the cost of replacing a radiator, sleek designs like this look much more discreet in the home.
Preventative and Protective Measures
So, you’ve got your shiny new radiator, but you never want to go through the stress of fixing a leaking radiator again. If that’s the case, make sure to use a Rust and Corrosion Inhibitor and clean your water using a Radiator Cleaner on a regular basis! You should also be sure to check the hose connections that join the radiator to other parts of your central heating system for any signs of malfunction. Identifying potential problems early on can help you avoid having a leaking radiator.
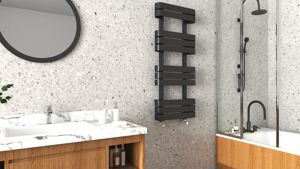
Finding water leaking from your radiator is an annoying problem but, it’s easier to fix than you probably think. If you do need to replace your radiator or valve, make sure to check out our huge range of products. We have a diverse collection of radiators including chrome radiators, eye-catching feature models and a range of modern heated towel rails. Plus, we also stock everything you need to keep your radiator ticking like valve fixtures.